
Bridged Thermal And Night Vision
- January 18, 2025
- By Jared Daub
Bridged Thermal And Night Vision

Bridged Thermal And Night Vision is a concept we have spent immense effort discussing in our content. The reason for this is really quite simple: A Dual Band Bridged Setup will offer you more capability than thermal or night vision alone. We stumbled into this combination through years of predator hunting. We quickly realized that what works for hunting coyotes, would work for defense of liberty. For that reason, we took the concept under our wing and worked within the industry to spread the message. We are about maximizing our capabilities as individuals because we know this is the best defense against tyranny. Having this gear and then training with it with purpose gives our people teeth. It secures our freedoms and ensures that they will never be taken without a fight.
Dual Band Can Be Confusing
We have answered, no joke, thousands of emails and comments about these setups. From bridges, to mounts, to properly setting each unit up, and more. We’ve discussed the individual thermal units, best night vision practices, and how to generally get the most out of these setups. Through all of this we have developed our own personal go to kits for Peak Performance as a man in the dark. We would love to share the concept with you.
What does Peak Performance look like in the dark?
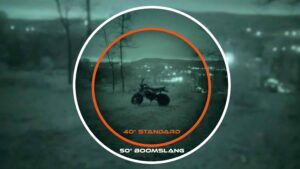
Okay okay that questions kinda loaded… In reality what we’ve found to serve us best in the dark is increased situational awareness. Having the widest FOV possible is a major benefit with all optics. Base magnification and field of view. These are two commonly overlooked details that are important to be considered on any thermal or night vision device. For example grabbing the 50° wide FOV Boomslang Glass on a Photonis Vyper-14 is hands down one of the best decisions you’ll make for increased situational awareness. Standard glass is only giving you a 40° FOV.
Having two thermals is also a huge efficiency add as long as you follow this one general rule of thumb. Be sure your scanning thermals base magnification is lower than your Weapons mounted thermals base magnification. All to often we run into people that have a 3X base mag thermal scanner and a Weapons mounted thermal with 2x base magnification. This is completely backwards. Best common practice is to have a low 1x base magnification helmet mounted thermal scanner. Pair this beside a 3X base magnification weapons mounted thermal and you have a sufficient workflow. This will allow you to effectively scan, but get up close and personal when its time to shoot.
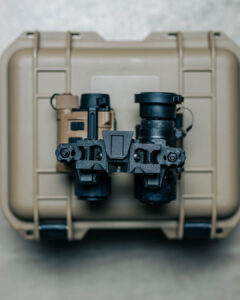
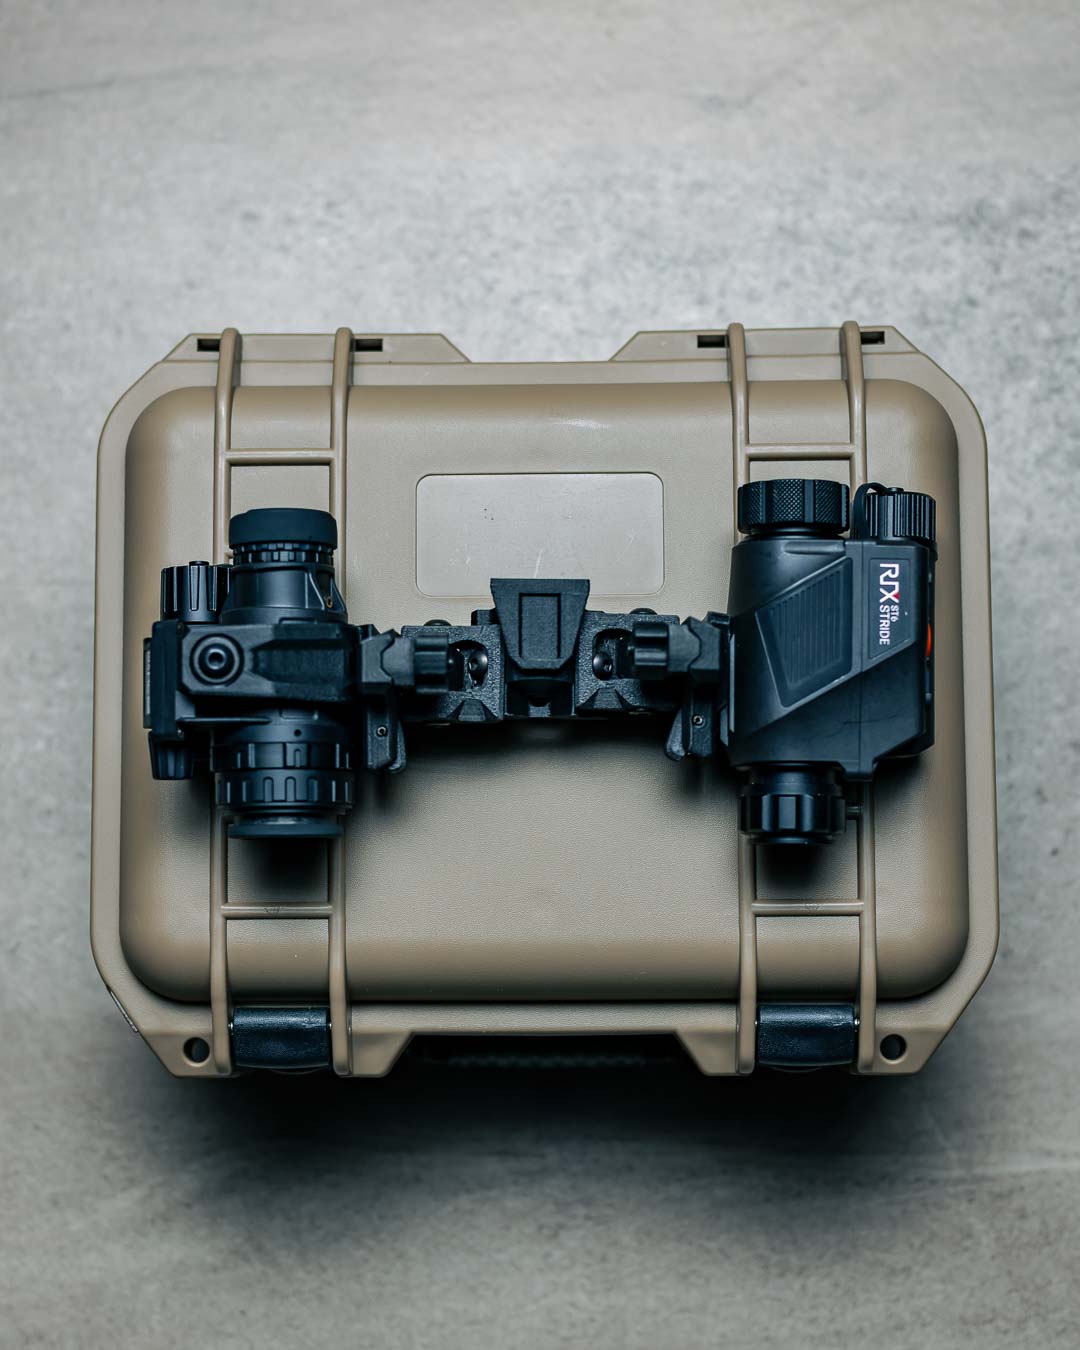
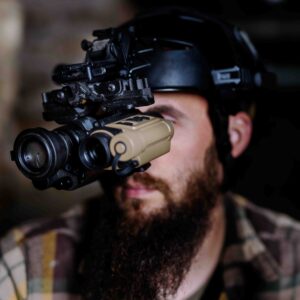
The Ultimate Combo
The combination of the Photonis Vyper-14 with 50° Glass and a 1X thermal like the RH25 on one bridge like the Symbiote will serve you well. Keeping these things helmet mounted will maintain a hands free approach to anything in the dark with a wide FOV from both units. This is peak male performance in the dark that cannot be argued. Add in a 3X base magnification weapons mounted thermal to this helmet build and they will never know what smacked them.

What do I need outside the Helmet to hold all of this together properly?
Outside the helmet of your choosing you need a counter weight and a Wilcox G24 or a Cadex mount to go between the Helmet and the bridge holding the two units is an important piece to the puzzle that should not be overlooked.
Counter weights are important!!
Something we see some guys trying to skip is the counterweight. To us a counter weight is a non negotiable. Without a balanced helmet, you will deal with added neck strain that will eventually lead to headaches over the long haul if it’s not addressed. It’s better to have a heavier balanced helmet than a lighter unbalanced helmet.